Showing posts with label Event. Show all posts

Sunday, 24 May 2015

Alu - Shimla Mirch Subzi / Potato - Capsicum Curry for CCC

I hate capsicum. I really hate it. Then why did I make this dish, you might ask. For my older one. You see, he's eating new vegetables at school during his lunch. So he comes back and asks me to make that vegetable.

I had been avoiding making this dish for a long time now. I know I was being a bad mother. But I really hate capsicum to that extent. But one fine day, my husband got the vegetable and insisted I make it. I wasn't left with much of a choice then.

My pinni (mother's sister - my usual source of recipes) had given me this recipe when I was in Scotland. She wanted me to make it for Preetham. But I could never get myself to make it. Finally I made it.

Our Cherished World - Alu Capsicum


I can't say I liked it. But my husband and my son liked it. Infact, I made it twice within a week and it was polished. So I guess it wasn't bad. :)

Ingredients:
1 medium Capsicum / Green Pepper - cubed
2 medium Potatoes - chopped into 1 inch pieces
1 medium Onion - chopped
1 medium Tomato - chopped
1 tsp Ginger Garlic Paste
1 tsp Cumin Seeds
1/2 tsp Coriander Powder
1/2 tsp Chilli Powder
1/4 tsp Turmeric Powder
2 tbsp Oil
1/2 cup water
Salt to taste

Method
  1. Heat Oil in a pan. When oil is hot, add the Cumin Seeds and let them sizzle.
  2. Now add the Onions and cook till they change colour.
  3. Add the Ginger Garlic paste and fry till the raw smell goes.
  4. Stir in the Tomatoes, Coriander Powder, Turmeric Powder, Chilli Powder and Salt and cook till the tomatoes are soft.
  5. Now add the Potatoes, Capsicum and half cup water. Mix well and pressure cook for 1 whistle.
  6. Once the pressure goes down, remove and serve hot with rice / rotis.
Our Cherished World - Alu Capsicum

This joins the May Week 4 Cooking from Cookbook Challenge Group.


Sunday, 17 May 2015

Palaaku Annam / Spinach Rice for CCC

Hello Guys...

I am finally back in the food blogging world and hopefully will remain here (atleast for some time). We are settled in our new apartment with the usual hiccups now and then. I've been cooking lately and have been enjoying doing so. Especially when the food is appreciated and the dish is emptied.

One such dish is Spinach Rice. A simple rice dish which my mother and aunt eat when they fast. They make it with vegetables and avoid the onion, ginger and garlic.

Since we make it as a non fasting meal, they tweaked the recipe and told me this. Both my older and younger son like it. Its healthy, filling and easy to make. Only thing is, I used less spinach when I made this. Next time, I'll use double the quantity of spinach I used this time. I can foresee myself making this very often.

Our Cherished World - Spinach Rice

Ingredients

4 bunches  Spinach - washed well and chopped
1 cup Rice - washed and soaked in water for about 30 mins
1 Onion - chopped
2 Green Chilli - slit length wise
1 Tomato - chopped
8 to 10 Peppercorns - can be used whole or crushed
1 tsp Cumin Seeds
1 tsp Ginger Paste
1 tsp Garlic Paste
2 tbsp Oil
1.5 cups water

Method
  1. Heat oil in a pressure cooker. Once its hot, add the Cumin Seeds and let them crackle.
  2. Now add the Onions and Green Chilli and fry till the onions are translucent.
  3. Add the Ginger and Garlic Pastes and fry till the raw smell goes.
  4. Now add the Tomatoes and Peppercorns and cook till the tomatoes are soft.
  5. Add the Spinach and fry till it starts to wilt.
  6. Then add the rice and fry for 5 mins.
  7. Now add the 1.5 cups of water and bring to boil.
  8. Then mix well, cover and cook for 1 whistle.
  9. Serve hot with Raita or on its own.


Note: I used Sona Masoori Rice. If using Basmati Rice, you might have to increase the water to 2 cups.

This joins the May Week 3 Cooking from Cookbook Challenge Group.


Saturday, 3 December 2011

Ala Badun - Sri Lankan Spicy Potatoes & Onions

After a mild November, December has come with the harsh winter. Its freezing... The only thing I like about December are the lights and excitement of Christmas.

We've put up our Christmas tree today. V was very excited. He's going to Santa's grotto at his nursery tomorrow. Don't know how he'll react then. I am so excited for him. Hee hee...

Anyways. When I saw that Priya is hosting Flavours of Sri Lanka, I started googling for Sri Lankan vegetarian recipes. The one recipe that appeared on every website I visited was Alu Badun - spicy potatoes and onions. And its been ages since I prepared my Alu Fry. So I decided to give this a try.

 It was completely different from whatever I've had till date... In a very nice way.


Ingredients
2 big Potato - boiled, peeled and cut into bite size pieces
1 big Onion - finely chopped
1 tsp Chilli Powder
1 tsp Paprika
1/4 tsp Turmeric Powder
2 sprigs of curry leaves
1 tsp Ground Mustard (See Note)
1 inch Cinnamon stick
2 tsp Lemon Juice
3 tbsp Oil
Salt to taste

Method
  1. In a bowl, take the Potatoes and mix with Salt, Turmeric, Chilli Powder and Paprika Powder.
  2. In a pan, heat the oil.
  3. Add the curry leaves and fry for a few seconds.
  4. Now add the Onions, Ground Mustard Seeds and Cinnamon and fry till the Onions turn golden brown.
  5. Add the Potatoes to the pan, mix well and cook till the Potatoes are heated through.
  6. Add the Lemon juice, mix well and turn off the heat.
  7. Remove the Cinnamon Stick and serve hot with rice / roti.

Note: Soak 1 tsp Mustard Seeds in warm water for about an hour. Crush the seeds using Mortar & Pestle / Mixie to the desired consistency.


This goes to Priya's Flavours of Sri Lanka that was started by Nayna.


Friday, 11 November 2011

Pesarattu / Mung Bean pancakes

Finally back with a new recipe. Hope I can continue putting up more recipes as I did last year.

As far as I know, this is a very "Telugu" dish. This is a quicker & healthier option to Dosa. Quicker because there's no fermentation required. Healthier because it uses more green gram than rice. You can make it more healthy(and tastier) by "filling" it with different kinds of vegetables.


Upma is the favourite accompaniment to this. The "Pesarattu – Upma" combination is often called MLA Pesarattu. I am not sure how or why this name originated but that's how the combo is called.

According to me, Pesarattu is best eaten with Ginger Chutney. I don't know how to make this and I get this from India.

Though rice is not required for this recipe, I use a little bit of rice to give it the crispy texture.


Ingredients:
2 cups Mung Beans
2 tbsp raw rice OR 1/2 cup cooked rice
2 tsp Ginger Paste
1 Onion - roughly chopped
3 Green Chillies (adjust)
2 tsp Cumin Seeds
Salt to taste

For the filling: (optional)
1 Big Carrot – finely grated
1 Onion – finely chopped
2 – 3 Green Chillies (adjust) – finely chopped
1 – 2 tsp Grated Ginger

Method
  1. Soak Mung Beans and rice separately for atleast 12 hours.
  2. In a blender, add all the ingredients (not the ones under filling) except Mung Beans and blend to a smooth paste using as little water as possible.
  3. Now add Mung Beans and blend to a coarse batter using as little water as possible.
  4. This batter is a little thicker than the regular dosa batter.
  5. Heat a dosa pan (crepe pan) to medium high.
  6. Pour a ladle full of the batter and spread it as thin as possible
  7. Add the spread the filling as required.
  8. Pour a tsp drop by drop around the ends of the pesarattu and cook well.
  9. If required, flip it and cook for some more time.
  10. Flip it back and fold it in half and remove it onto a plate.
  11. Serve hot with a chutney of your choice.

Note: This is a bit heavier than the regular dosa. You might not be able to eat as many as regular dosas.

This goes to Priya's Cooking With Seeds-Mung/Moong Beans

Tuesday, 9 August 2011

Ragi Dosa

Ragi Dosa

I like Ragi (Finger Millet) for its nutrional value. In my first attempt to give V Ragi, I made Ragi Dosa. He loves Dosa so I assumed he will like this as well.

I was wrong. He didn't like the taste. But P kept him busy and fed him.


I first had this dosa when my cousin made for me last September. I really liked it. She got it very thin and "lacy". I didn't get it anything like that. It was more like dosa. I guess I need to practice more to get it right. It was tasty though. I will be making this more often and keep giving it to V. He'll develop a taste for it.

This is quiet simple. It doesn't need fermentation time. Just some "resting" time of about half an hour.


Ingredients
2 cups Ragi Flour
1 cup Rice Flour
1 cup Curd – Beaten well
1/2 Onion – Finely Chopped
2 Chillies – Finely Chopped
1 Carrot – Grated (optional – but healthy)
2 cups Water
Salt to taste
Oil for making dosas

Method
  1. Sift the flours and Salt into a bowl. Add curd to this and mix well.
  2. Add water and keep stirring so that no lumps are formed.
  3. Add the Onion, Chillies and Carrot and mix well.
  4. Add more water if needed. It should be watery in consistency.
  5. Keep aside for atleast half an hour.
  6. Heat a dosa pan and pour the batter to form a dosa. You will not be able to spread it.
  7. Turn the heat to medium and cover and cook for atleast 2 minutes.
  8. Add Oil to the edges so the dosa wont stick to the pan.
  9. Flip the dosa and again cover and cook for atleast 2 minutes.
  10. Serve with Chutney or by itself.

Note 1:I made dosa for V before adding the Onion and Chillies.
Note 2:My dosas came out a bit thick. So I had to cook it for around 3 minutes on each side. Any tips are welcome if you know where I went wrong. :)

This goes to Denny's Cooking with Whole Foods - Ragi / Finger Millet that was started by Kiran.


Tuesday, 26 July 2011

Matar Paneer

Another recipe from Sailu's Food. This is probably the most cooked dish in our house from her blog. P is in love with the dish. I made it for one of our friends and she loved it as well. This is another proof that you just can't go wrong with her recipes if you follow them right.

We eat it with rotis and rice.


The very first time I made this dish, I didn't have a few ingredients (Kitchen King Masala, Kasuri Methi and Cream) but it still tasted good. But with all the ingredients, it tasted just perfect.

Since we make this regularly, we avoid the cream. We use cream only when we are expecting some guests.

Without any more blabbering, here’s my version of the recipe:


Ingredients
250 gms Paneer – Cubed
1 cup Frozen Green Peas
1 Large Onion – finely chopped
2-3 Green Chillies – finely chopped
3/4 tsp Ginger Paste
3/4 tsp Garlic Paste
1 Tomato – Finely Chopped
1 tsp Red Chilli Powder
1/4 tsp Turmeric Powder
1 tsp Coriander Powder
1 tsp Kasuri Methi (Dry Fenugreek Leaves)
1/4 tsp Garam Masala Powder
1 tsp Kitchen King Masala Powder
1 tsp Cream
2 tbsp Oil
Salt to Taste
Chopped Coriander Leaves for Garnish.

Method
  1. Heat Oil in a pan. Saute the Onions and Chillies till the Onions turn translucent.
  2. Now add the Ginger and Garlic pastes and fry till the raw smell goes.
  3. Add the Turmeric Powder, Coriander Powder, Red Chilli Powder and mix well.
  4. Add the tomatoes and cook for 5 minutes - until the tomatoes are cooked well.
  5. Take a hand blender and grind to a coarse paste.
  6. Add a cup of water and bring to a boil.
  7. Now add the Peas and Paneer and cook till the Peas are done
  8. Now add the Kitchen King Masala, Kasuri Methi (crush this between the palms of your hands) and Garam Masala and mix well.
  9. Turn off the heat and add Cream and mix.
  10. Garnish with Chopped Coriander Leaves and serve with Rice / Roti.

This goes to the following events:

Radhika's Let's Cook - Subzis


Jayashree's Healthy Lunchbox Ideas - Paneer that was started by Kalyani


Priya's Bookmarked Recipes - Every Tuesday - 26th July 2011(Volume 51)

Monday, 18 July 2011

Baked Falafel

This recipe has been in my to-try list for almost a year now. P was not a fan of chickpeas – that's what kept me from making this. His "liking" for chickpeas changed recently when one of our friends made this yummy chole. From then, he doesn’t mind chickpeas so much.

He’s also opened up to me trying out new recipes. With this combination, I had to try out this recipe that I had been "eyeing". I had found too many recipes for this. While some were too elaborate, some were too simple. I came up with the following recipe after keeping in mind that I need to feed V also the same thing – so it shouldn't be too spicy for him.

Chickpeas are high in protein. It is one of the sources of proteins in a vegetarian diet. The traditional Falafel is deep fried. Baking it is a healthier option.


Here's how I made this:

Ingredients
1 cup dry chickpeas – soaked over night and cooked
2 Green Chillies – Finely Chopped
1 cup Corainder Leaves – Finely Chopped
1/2 cup Mint Leaves – Finely Chopped
1 tsp Cumin Powder
1 tsp Coriander Powder
1 tsp Chilli Powder
1 tbsp Garlic Paste
1 tbsp Ginger Paste
2 tbsp Whole Wheat Flour (I used Atta)
1 tsp Baking Powder
Salt to Taste
Oil to grease baking tray.


Method
  1. Pre heat the oven to 200oC.
  2. Take all the ingredients except Oil in a food processor and pulse to a coarse mixture.
  3. Take a baking tray and grease with Oil.
  4. Make 12 patties with the mixture and place them on the tray.
  5. Bake for 40 mins turning once in between.
  6. Serve hot with a dip / sauce.

Note 1: I made 20 patties – that's why they are thin. I will be making 12 patties next time so they are thick.
Note 2: I didn't add the green chillies to the food processor. I took out a few patties for V and added the green chillies and made the rest for us. This way, V didn't find it too spicy. It was right for us too.

This goes to the following events:

Shobha's Cook it Healthy.


Harini's Only Baked that was started by Pari.

Wednesday, 13 July 2011

Carrot Roti

Yes... My blogging has slowed down. I am trying to keep up and not let the blog "die".

The problem is, I need to wear my glasses when I am at the computer. That's not the actual problem. I've gotten used to it at work. But my son thinks they are sunglasses and wants to wear them. I tell him to wear his own sunglasses and that these are not sunglasses. He doesn't listen and he wants only my "sunglasses".

I decided its best not to wear them for sometime when he's around. And by the time he sleeps, I am too tired to think of writing anything.

But now, I thought instead of browsing around during my lunch hour, I'll try and do a write up sometimes. I just need to edit photos when I am at home before posting. Makes more sense, doesn't it? Not that I'll be posting everyday. But at least I can do some write ups now and then.

This recipe is again very subject to individual taste. Everything depends on how spicy you want it. I myself don’t stick to one recipe.


Ingredients
2 Carrots – peeled, roughly chopped and cooked well
1/4 tsp Chilli Powder
1/4 tsp Coriander Powder
1/4 tsp Cumin Powder
1/4 tsp Ginger Paste
1/4 tsp Garlic Paste
2 cups Atta (Chapati Flour)
Salt to Taste

Method
  1. Blend together the cooked carrots, Chilli Powder, Coriander Powder, Cumin Powder and Salt to a smooth paste adding water as needed. Make sure the paste is not watery.
  2. Take atta in a bowl and incorporate the carrot paste into it.
  3. Add water if necessary and make the dough.
  4. Let it rest for atleast 20 mins and make Rotis(Phulkas).
  5. Serve with any curry.

Note: I have learnt how to make Chapatis / rotis on my own. My guide has been Shilpa of Aayis Recipes. I've also seen some videos on You Tube. It just takes practice.


This goes to:

Reva's Veggie / Fruit a Month - Carrot that was started by Priya.

Wednesday, 4 May 2011

Gobi Matar Subzi / Cauliflower Green Peas Curry

Yes. Its been more than 10 days since I last blogged. Not an intentional break.

Things were extremely busy - at work and at home. Whatever little time I got in between, I was too busy taking care of my plants. FYI, I have planted 2 rose bushes in my back garden. Can't wait for them to grow... I am so excited.

My parents are coming this weekend and I am too excited. I can finally take a break from cooking and stop planning dinners. Its so nice to have dinner ready on the table by the time you get back home. Can't wait for the weekend...

Now back to the dish... I prepared this more than 10 days ago. I was browsing through Pratibha's blog to participate in this month's T & T that's hosted by Sushma. T & T was started by Zlamushka and is now taken over by Lakshmi.

I found this recipe. It had been ages since I prepared Cauliflower. So I tweaked it a bit and the result was delicious.


Here's my version of the recipe:

Ingredients:
1/2 kg Frozen Cauliflower Florets
1 cup Frozen Green Peas
2 Medium Onions - chopped
6 tbsp Chopped Tomatoes
1.5 tsp Ginger Garlic Paste
1 tsp Red Chilli Powder
1 tsp Coriander Powder
1/2 tsp Cumin Powder
1/4 tsp Turmeric Powder
1/2 tsp Kitchen King Masala
1/2 tsp Kasuri Methi
1 tsp Cumin Seeds
2 tbsp Oil
Juice of 1 Lemon
Salt to taste
Chopped Coriander Leaves for garnish

Method
  1. Heat oil in a pan. When hot, add the Cumin Seeds and let them crackle.
  2. Add the onions and fry till the colour changes.
  3. Add the Ginger Garlic paste and fry till the raw smell goes.
  4. Add the tomatoes, Salt, Turmeric Powder, Chilli Powder, Coriander Powder and Cumin Powder and cook till oil separates.
  5. Add the Cauliflower florets and Green Peas and cook till done.
  6. Now add the Kitchen King Masla and Kasuri Methi and mix well.
  7. Turn off the heat and add the Lemon Juice and mix well.
  8. Garnish with chopped Coriander Leaves.
  9. Serve with Rice or Roti.


Saturday, 23 April 2011

Mini Idli – Sambar

Another of V's favourite. He loves to hold the small idlis and gobble them up. We try our best to make him eat slowly. But he somehow manages to eat them really fast.

Its such a pleasure to see him eat like that. I think why cant he eat everything like that???

I make this once in 10 to 15 days. He gets excited when he sees the idli cooker and the mini idli stand on the counter.

For the idlis, grease the mini idli stand and keep it to the side. Add water in the idli cooker and get it to a rolling boil.

In the mean time, take sufficient amount of Idli / Dosa batter in a bowl. If you need, add boiling water to get the consistency for idli batter. Now add enough salt and a pinch of Soda-bi-carbonate and mix well. You will notice that the batter rises almost immediately. Spoon out the batter into the idli stand. Put this in an idli cooker and steam for around 20 mins.

Look at the mini idli stand ready to go into the idli cooker.


This sambar is a little different (and easy) from the regular sambar. This is how they make at my house when they make idlis (every day). Its more watery than the usual sambar. You can make it thick if that’s how you like.


Ingredients:
1/2 cup Toor Dal washed
1/2 Onion sliced thinly
3 Red Chillies torn in the middle
3 tsp Chopped Tomato
¼ tsp Fenugreek Seeds
½ tsp Mustard Seeds
½ tsp Cumin Seeds
10 to 15 Curry Leaves
½ tsp Tamarind Concentrate
¼ tsp Hing
2 tbsp Oil
Salt to Taste
Chopped Coriander Leaves for garnish

Method
  1. Pressure cook Toor Dal, Onion, Red Chillies, Chopped Tomato, Hing in 1 and a half cup of water till done (it takes about 3 whistles for me). Mash it well.
  2. In a separate pan, heat Oil.
  3. When hot, add the Fenugreek Seeds, Mustard Seeds and Cumin Seeds and let them crackle.
  4. Add the Curry Leaves and fry for a minute.
  5. Add the Tamarind Concentrate and cook for 2 minutes. Add a little water if necessary.
  6. Transfer this to the pressure cooker along with 1 and a half cup of water and Salt.
  7. Mix well and bring to a rolling boil and turn off the stove.
  8. Garnish with Coriander Leaves and serve hot with idlis.

Note 1: If you haven’t made idlis till date, I would suggest you watch it (either live or on the web) to know the consistency of the batter. It will be a trial and error later. But atleast you have a base to work on.
Note 2: If you want the sambar to be thick, add less water when mixing the salt.
Note 3: I like to put my idlis in a bowl, add the sambar and leave it for some time to cool and soak.
Note 4: If there’s any left over, I mix the idlis and sambar and put in the fridge. It tastes much better when the idlis are soaked well.

This goes to the following events:

Srivalli's Breakfast Mela
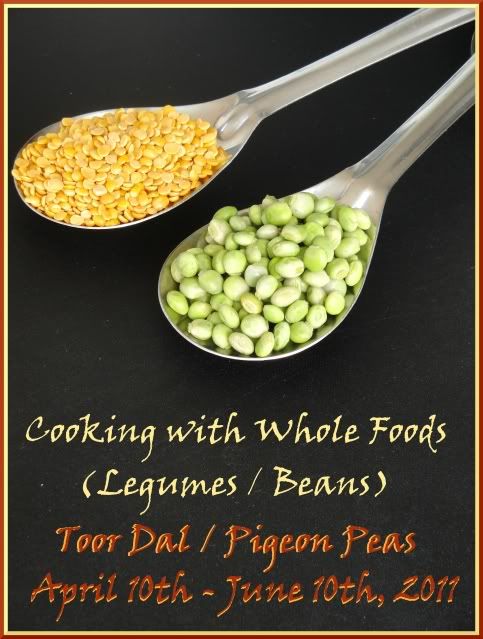
Suma's Cooking with Whole Foods (Legumes / Beans) - Toor Dal / Pegion Peas that was started by Kiran.

Tuesday, 19 April 2011

Semiya Pulihora / Spicy and Tangy Rice Vermicelli

This is another of my regular dishes. I make this when I am crunched for time. Its simple, easy and very delicious (atleast according to me).

I've always liked my Pulihora with Lemon. In my house they used to make it with Tamarind most of the time.

I don't give V as he "rejected" it twice. I guess this needs to be altered for his taste. Since I make this when there's not enough time, there's no chance of altering it. I think I'll just let him grow a bit more before giving it again. When I make this dish, there's always some thing in the freezer for him.


Now to the recipe:

Ingredients:
250 gms Semiya / Vermicelli / Rice Noodles
Zest and Juice of 1 big lemon
1 Green Chilli – slit vertically
1 tsp Mustartd Seeds
2 tsp Chana Dal
1 tsp Urad Dal
15 to 20 Curry Leaves
1/2 tsp Ginger Paste
1/4 tsp Hing
1/4 tsp Turmeric Powder
2 tbsp Oil

Method
  1. Cook Semiya according to the package instructions. Please see Note 1 below to see how I cooked it.
  2. In a separate pan, heat the Oil.
  3. When hot, add the Mustard Seeds.
  4. Once they splutter, add the Hing, Chana Dal, Urad dal and the Green Chilli and fry till they start to change colour.
  5. Add Curry Leaves, Ginger Paste and fry for a minute.
  6. Add the Turmeric Powder and Lemon Zest and mix well.
  7. Turn off heat and add the Lemon Juice and mix well.
  8. Pour over the Semiya and mix well. I use my hand to mix it.
  9. Serve hot.


Note 1: In a pan, pour enough water so the broken semiya will immerse fully. Add salt to this and get to a rolling boil. Put the semiya into the water and immerse well. Let it cook till its done (approx 4 to 5 mins). Drain immediately. Pour cold water on it to stop cooking. Add 2 tsp Oil and cover the semiya well. This will prevent the semiya from sticking. If possible, spread out the semiya. I don’t spread out the semiya. Its easy enough to separate it when you are mixing.

Note 2: You need to be real fast when you are making the actual "sauce" as the Dals can burn very quickly once they start changing colour.

This goes to CBB Series 3 - Evening Tiffins at Tickling Palates.


Tuesday, 29 March 2011

Kothmira Annam / Coriander Rice

I finally planted my herbs on Thursday. The pots are sitting near the garden door in my kitchen. It will take about 2 weeks to get the saplings I suppose. I'll keep you updated on this part.

Time changed on Sunday so we "lost" an hour. We are on summer time now. I don't know why they change the time though.

This is one of the first dishes I tried out from Sailu's Food. I've tried a lot of other recipes from her blog ever since and everything I make is a hit. They are all on my "To Blog" list.
This is another dish I hadn't prepared in a long time. I tweaked it a teeny weeny bit from Sailu's blog to our taste and my convinience. Here's my version:


Ingredients:
1.5 cups rice, washed and soaked in water for half an hour and drained
Stems of coriander from a big bunch - chopped - you can use leaves also
2 Green Chillies slit length wise
1 tsp Ginger Paste
1 tsp Garlic Paste
3 tbsp Chopped Tomatoes
4 Cloves
2 Green Cardamoms
1 inch Cinnamon Stick
1 Bay Leaf
Salt to Taste
2 tbsp + 2 tbsp Oil

Method
  1. Heat 2 tbsp Oil in a pan.
  2. When hot, add the Chopped Coriander Stems and the Chillies and fry till the raw smell goes.
  3. Remove from heat, add the Ginger and Garlic pastes and blend. Add a little water if necessary.
  4. Heat the other 2 tbsp Oil in a separate pan.
  5. When hot, add the Cloves, Cardamoms, Cinnamon and Bay Leaf and for a minute taking care they don't burn.
  6. Add the ground paste and cook for 3 to 4 minutes.
  7. Now add the Chopped Tomatoes and cook for 3 to 4 minutes.
  8. Add the drained Rice and mix well.
  9. Add 2 cups water, salt and cover and cook till the rice is done.
  10. Serve hot with raita / plain curd

This goes to the following events:

Kirthi's Herbs and Flowers in my Platter - Coriander leaves/Cilantro that was started by PJ of Seduce your Tastebuds.

Priya's Bookmarked Recipes Every Tuesday Volume 34 - 29th March 2011


Friday, 11 March 2011

Rava Idli

We are going to Manchester this weekend to visit my husband's brother and his wife. I am looking forward to meet them as its been almost 7 months since we've met them.

I love the Traffod Centre in Manchester. Its one of the most beautiful malls I've seen. We generally go to the mall every time we go to Manchester. How the whole day flies there, I still don't understand. Anyways, its just the weekend we are going for, so there won't be any breaks in blogging (as it is I blog once in 3 - 4 days).

Here's the Rava Idli recipe that I make with my Homemade Mix. Remember the veggies are totally optional. You can add more or avoid them totally. I did not add carrots when I clicked these photos. Hope you enjoy this as much as we enjoy it.


Ingredients:
1 cup Homemade Rava Idli Mix
1 cup curd
1 tsp Chilli Paste / 1 Chilli finely chopped
1 tsp Ginger Paste
1 Carrot - grated
1/2 cup Frozen Peas
1 tsp Eno Fruit Salt
Water - as needed
Salt to taste

Method
  1. In a bowl, take the curd and beat it with a fork.
  2. Mix in the Salt, Green Chilli Paste, Ginger, grated Carrot and Peas.
  3. Add the Homemade Rava Idli Mix and mix well so no lumps are formed.
  4. Add water to get the consistency of idli batter. Instead of water, you can also use more curd. Remember that Semolina soaks up a lot of water / curd.
  5. Leave it for about 20 mins to rest.
  6. In the meantime, grease the idli stand with oil.
  7. Add Eno Fruit Salt to the idli batter, mix well and pour into the idli moulds. Do not fill till the top as the idlies will rise.
  8. Steam it for about 20 mins.
  9. Serve hot with chutney or on their own.


This goes to Veggie Platter's Cooking With Seeds - Wheat. Cooking With Seeds was started by Priya.


This also goes to ARS B For Breakfast.