Showing posts with label Indian. Show all posts

Friday, 23 December 2011

Vegetable Kothu Paratha / Kothu Roti

This is the famous road side food in Chennai. I’ve never eaten it in Chennai, but when my cousins came to visit me last year, they made this for us and it was very tasty and different (for us).


They made it with Chicken and Egg. I wanted to try making it with Vegetables for a long time now, but never got around to do it. I was going through Amy’s blog and found that Kothu Roti is part of the Sri Lankan cuisine as well.


Serves: 2 – 3 as main course OR 4 – 5 as snack

Ingredients
5 Layered Parthas – cooked and roughly chopped (I used store bought frozen ones)
2 Onions – finely chopped
3 Green Chillies – finely minced (adjust)
2 cups mixed vegetables (I used Carrots, Beans & Peas)
1 tsp Ginger Paste
1 tsp Garlic Paste
2 Tomatoes – finely chopped
½ tsp Red Chilli Powder (optional)
¼ tsp Turmeric Powder
1 tsp Coriander Powder
1 tsp Mustard Seeds
1 tsp Cumin Seeds
20 Curry Leaves (1 sprig)
2 tbsp Oil
Salt to taste (remember that the parathas will have salt in them)

Method
  1. Heat Oil in a pan – I used a frying pan as its easier to mix everything.
  2. Once hot, add the Mustard and Cumin Seeds and let them crackle.
  3. Add the Green Chillies and Curry Leaves and saute for a minute or so.
  4. Add the Onions and fry till they turn transparent..
  5. Now add the Ginger and Garlic Pastes and fry till the raw smell goes.
  6. Add the tomatoes, Turmeric, Coriander and Chilli (if using) Powders and cook till the masala comes together.
  7. Now add the Vegetables, mix and cook till they are done.
  8. Now add the chopped parathas and mix well and cook till the parathas are heated through.
  9. Serve hot with Raita or on its own.
Note 1: I have torn the parathas with hand. The pieces are not uniform, but we don’t mind.
Note 2: You can add boiled vegetables to reduce the cooking time.


After our dinner, there was enough left for my lunch box the next day.

This goes to the following events:

Priya's Cooking with Seeds - Peas


Veena's HLI - Peas that was started by Kalyani.


Valli's Snacks Mela


Priya's Flavours of Sri Lanka that was started by Nayna.


Monday, 7 February 2011

Goru Chikkudu (Guvar) - Mamidikaya Kura / Cluster Beans – Raw Mango Curry

Mamidikaya – Ooooh! I love it. I used to wait for summer in India just to eat it. I am taking about the raw variety. The really tangy one. I would finish any dish made with this. I remember, me and my mom used to eat the raw mangoes every day – with salt and chilli powder. I am sure many of you are aware of this. It was almost like a competition between us.

I love almost anything tangy. I am happy that V also likes the "tangy stuff". So I try and use raw mangoes whenever I get good ones.

My mother had got these cut mango pieces from India and they were in the freezer. Ofcourse, I ate queit a few pieces before I put them in the freezer.

When I called my pinni (mom's sister) – my usual source of recipes what to do with the Guvar that I had bought, she told me the recipe and said – "If you add mango, it'll be really tasty. But I don't know if you can get mangoes there". I told her I have mangoes and I'll use them. After I put down the phone, I made this and it was amazing.


Ingredients:
1 packet (400 gms) Frozen Cut Guvar
1 Raw Mango – Cut into 1 inch Chunks (Make sure it’s the Tangy Variety – not the sweet one)
1 Onion – chopped
3 tbsp Chopped Tomato
1 tsp Mustard Seeds
2 tsp Jeera Seeds
2 sprigs Curry Leaves
1/2 tsp Turmeric Powder
1 tsp Red Chilli Powder
2 tbsp Oil
Salt to Taste

Method
  1. Heat Oil in a pan. When hot, add the Mustard Seeds and let them Pop.
  2. Then add Jeera and let them crackle.
  3. Now add Curry Leaves and fry for a minute.
  4. Add the Onions and allow them to change colour.
  5. When the Onions are brown in colour, add the Tomato and cook till the oil separates.
  6. Now add the Salt, Turmeric Powder and Chilli Powder and mix well.
  7. Add the Guvar and mango and mix well so the masala is ncorporated into them.
  8. Cover and cook till the Guvar is done.
  9. Serve with Rice. (I am sure it'll be good with roti as well – I didn't try it).

Note: Adjust the amount of mango depending on its size and how tangy you like yours.

This goes to JFI Re-Run Mango hosted by Satya. JFI was started by Indira of Mahanandi. This is a re-run of the same event.


Thursday, 3 February 2011

Beans Coconut Fry

This was one vegetable I always ate without a fuss. Not that I love beans, but I don't mind it. My favourite in India was the Beans – Carrot Fry. I should try making that soon.

I tried out this recipe about 4 years ago and used desiccated coconut. It was nice, but I never made it again and I had forgotten about it. Recently, I was watching something on TV when I saw this combination (I don't remember what I was watching). I had frozen coconut and cut beans in the freezer. So I thought I should give it another try.

This is my own recipe. Its extremely simple, so I am sure many of you know it. But I really didn’t take it from any one's blog / site (just to avoid copyright issues).


Ingredients
300 gms French Beans (cut into half inch pieces)
2 tbsp Grated Coconut (Fresh / Frozen (defrost it) / dessicated)
1 Onion – chopped
2 Dry Red Chillies Split
1 tsp Mustard Seeds
2 tsp Cumin Seeds
2 sprigs Curry Leaves
2 tbsp Garlic paste
1/2 tsp Turmeric Powder
1 tsp Chilli Powder
2 tbsp Oil
Salt to Taste

Method
  1. Heat Oil in a pan. When hot, add the Dry Red Chillies and fry for a minute.
  2. Add Mustard Seeds. Once they splutter, add Jeera Seeds and let them crackle.
  3. Now add Curry Leaves and fry for a minute.
  4. Add Onion and fry till it browns.
  5. Now add the Garlic Paste and fry till the raw smell goes.
  6. Add the Turmeric Powder and Salt and mix well.
  7. Add the Beans and Grated Coconut, mix well and let it cook till the Beans are almost done.
  8. Add the Chilli Powder, mix well and cook till the Beans are done.
  9. Serve hot with Rice / Roti.

For the lovely green colour, this is going to Torview's Food palette series Green


This also goes to Sara's Corner's Healing Foods - Ginger and Garlic. Healing Foods was started by Siri of Cooking With Siri.


Friday, 21 January 2011

Chicken Vindaloo

Vindaloo – the fiery dish from Goa. I first heard of this about 4 years back when my colleague asked me if I knew how to make it. I was like "What???" He said that its very famous in UK but its like eating chilli powder. So he wanted to know how to make it. I told him I never heard of it.

Traditionally, this is made with pork. But since I don't eat pork or lamb or beef, the only choice I had was chicken. After googling a lot, I found a lot recipes. I followed this one. It wasn't as fiery as its perceived in the UK (or may be its just my taste palettes), but it had a lot of flavour and needless to say, it was very tasty.


Giving due credit to Clyde, here's my tweaked recipe:

Ingredients:
1 KG chicken
2 Onions – roughly chopped
15 Dry Red Chillies
2 tsp Jeera
3/4th tsp Turmeric Powder
5 to 6 tbsp White Vinegar (Distilled Vinegar)
1 tsp Ginger Paste
1 tsp Garlic Paste
10 Peppers
10 cloves
1 inch piece Cinnamon
Salt to Taste
2 tbsp Oil

Method
  1. Grind all the ingredients except Chicken and Oil to a smooth paste.
  2. Marinate the Chicken in the paste. The recipe called for a 24 hour marination. I marinated only for 4 hours.
  3. Heat Oil in a pan. Once the oil is hot, add the chicken and cook till done.
  4. Serve with rice or roti.

We had some left over jeera rice that we had it with. But it was much tastier with plain rice (second helping).

This goes to Flavours of Goa hosted by Oh Taste and See which was started by Simply Sensational Food.


Monday, 17 January 2011

Goan Prawn Masala for T & T

As I had mentioned in one of my previous posts, Sunday is the day when we have to have a non-vegetarian dish in our house. And non-vegetarian dish generally means a spicy dish.


When Sudeshna of Cook like a Bong announced this month's Tried and Tested that was started by Zlamuska and is continued by Lakshmi of Kitchen Chronicles, I went through Mallika's blog for a "good" (read spicy) non-vegetarian dish. Since we hadn't eaten prawns in a while, I settled for the Goan Prawn Masala.

As the post mentions, it was quiet spicy. But it had a lot of flavour and it was extremely tasty. I followed the recipe ingredient-to-ingredient, so I am not re-writing the recipe.


We had it with rice and enjoyed it immensely. I now have another blog to try out more recipes from. I wonder how I missed her blog for so long. I have already bookmarked a few recipes to try out from her blog. I'll let you guys know when I do try them out. Thanks Sudeshna - for introducing me to Quick Indian Cooking.

Wednesday, 5 January 2011

Alu Methi / Potato with Fenugreek Leaves

Simple foods are the best. You can never get enough of them. You can never say they are boring. Today’s dish fits into that category perfectly.

It just has the basic ingredients which can be found in any Indian Kitchen. The only thing that you might need to get is Methi (Fenugreek Leaves). I am sure every one has potatoes at home all the time.

I used frozen Methi which is readily available for me in the Indian Stores. You can use fresh as well. Make sure you wash it well.


Ingredients:

2 big Potatoes – chopped into 1 inch cubes (boil if you are using fresh methi)
100 gm Frozen Methi
1 Onion – finely chopped
2 dry red chillies – tear in the middle
1 tsp Mustard Seeds
1 tsp Cumin Seeds
1 tsp Red Chilli Powder
2 tbsp Oil

Method
  1. Heat oil in a pan. Once its hot, add the red chillies and fry for 30 seconds.
  2. Then add the Mustard Seeds and let them pop.
  3. Now add the Cumin seeds and let them crackle.
  4. Add the onions and fry till they turn brown.
  5. Add the potatoes and fry for a min.
  6. Now add the methi, half a cup of water, red chilli powder and salt. Mix well.
  7. Cover and cook till the potatoes are cooked. Add more water if necessary.
  8. Serve with rice / roti.

This is going to Veggie / Fruit a month hosted by Divya of Dil Se. The theme this month is Potato. This event was started by Priya of Mharo Rajasthan's Recipes.

Another interesting photo I have to add is the below one. I found this potato yesterday when I was making Upma. This is the first time I am coming across a different shaped potato. So I thought it might be interesting to post it.


This is also going to Complete my Thali – Subjis hosted by Padmaja of Seduce Your Tastebuds and started by Jagruti of Joy of Cooking.

Fenugreek Leaf on Foodista

Monday, 3 January 2011

Dondakaya (Tindora) Fry

I was a very fussy eater when I was in India. I never liked most of the dishes. So it was a task for my mother to prepare what I liked. I never liked Tindora.

But coming to UK and having to cook made me look at vegetables in a different way. I like most of the vegetables now. I wasn't sure if I should try making Tindora. But P likes it a lot so I thought I'd try it. Once I started eating it, I liked it. I experimented a lot before I stuck to this recipe.

This has become one of our favourites. And as usual, I use frozen, cut tindora to save time. I use Sambhar Powder. Sambar Powder gives it a distinct flavour. You can substitute it with red chilli powder.


Ingredients:
1 packet (400 gm) Frozen Cut Tindora
1 small Onion - finely sliced
3 Dry Red Chillies - Broken / Torn into 3 to 4 pcs each
1 tsp Mustard Seeds
2 tsp Cumin Seeds
10 - 15 Curry Leaves
1 tbsp Garlic Paste (I don’t like the bite of Garlic. You can replace this with 2 cloves of garlic chopped or crushed)
1/4 tsp Turmeric Powder
1 tsp Sambar Powder (you can substitute it with chilli powder)
Salt to Taste
2 to 3 tbsp oil
Salt to taste (I used 1 tsp)

Method
  1. Heat Oil in a Pan. When hot, add the Red Chillies and fry for a minute.
  2. Now add the Mustard Seeds and let them splutter. Then add the Cumin Seeds and let them crackle.
  3. Now add the Curry Leaves and fry for another minute.
  4. Add the Onion and fry till brown.
  5. Now add Garlic and fry for a minute.
  6. Add the Turmeric Powder and Salt. Mix well.
  7. Add the Tindora and fry till done.
  8. Once done, add the chilli powder, mix well and fry for 2 mins

This is one of the simplest Subzi for a Thali. So this goes to the Complete my Thali - Subji hosted by Padmaja of Seduce Your Tastebuds. Complete my Thali was started by Jagruti of Joy Of Cooking

Sunday, 26 September 2010

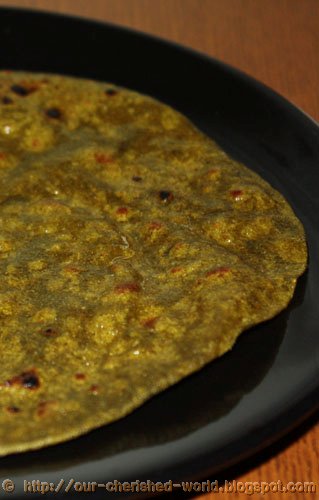
Palak Roti / Spinach Flat Bread

Me being a Telugu (South Indian), never had Rotis much at home. So for me to learn how to make them was a task. Now, I can say I can make decent (edible) rotis. All thanks to Aayi’s Recipes. She has a pictorial of how to make Rotis / Chapatis. If you want the basics, please refer to her page.

Once I could make rotis / phulkas, I decided to make a variation. I wanted to make palak rotis. They are healthy and quiet tasty as well. Its also a great way to make kids (small and big alike) eat their spinach. So here’s what I did. The rolling out and cooking is similar to the Phulkas on Aayi’s Recipes.


Ingredients:
100 gm frozen Spinach - cooked in microwave as per instructions and cooled
1/2 tsp Cumin Powder
1/2 tsp Coriander Powder
1/2 tsp Red Chilli Powder
1 tsp Ginger Garlic Paste
5 to 6 sprigs coriander (leaves and stems)
Salt to taste

For the Rotis:
2 cups Chapati Atta
Warm Milk to knead the dough
A few drops of Oil
Ghee / Oil for cooking (Optional)

Method:
  1. Blend the Spinach, Cumin Powder, Coriander Powder, Red Chilli Powder, Ginger Garlic Paste, Coriander and salt to a smooth paste. Add water only if needed.
  2. Add this to the dry Chapati Atta and mix well.
  3. Add enough warm milk to knead a soft dough.
  4. Cover it in a few drops of oil, wrap it in cling film and let it rest for atleast 20 mins.
  5. After it has rested, remove the cling film and knead it for 2 mins again.
  6. Now make golf sized balls (I usually get about 8 to 9 balls with 2 cups of atta).
  7. Take 1 ball and roll it
  8. Fry like a Phulka.
  9. Once the Phulka is ready, smear it with oil / ghee. Remember, a little goes a long way.
  10. Serve with curry / curd / pickle

    Sunday, 19 September 2010

    An Event and Rajma Salad

    When I saw Nupur of One Hot Stove hosting BB7 – Iron Chef Edition event, I wasn’t sure what ingredient to choose. There are so many good ones

    We had a couple over for dinner and movie (at home). P’s birthday was on a weekday. So we decided we’d call them on Friday. We thought once V sleeps (at around 9), we can have dinner and watch a movie. P and me wanted to do this for some time now, but never got around to do it.

    We decided to make Rajma curry (as one of the dishes).

    Rajma… I’ve always loved the simple Rajma Chawal from my college days. My Punjabi friend used to get it in her tiffin. It didn’t look or taste as if it had a hundred and one masalas or anything like that. I wasn’t much into cooking in those days, so never bothered to ask her for the recipe. Now when I think back, I really miss it sometimes. I’ve looked every where online but haven’t found the recipe. If any one knows it, please let me know. I’d really appreciate it.

    Since I was making Rajma, I decided to cook some extra Rajma as I’ve been wanting to try out the Spiced Kidney Bean Sandwich recipe from Sailus’s Food.

    Though I can make Rajma in my own way, I thought I should get a new recipe from another blogger so its different from what I usually make. After “Googling”, when I saw this Pujabi Rajma Masala recipe on Nandini’s Food Page, I knew I had my recipe. And I was right. It was tasty to say the least.

    If using tinned Rajma, drain and rinse well. If using the dry one, soak in lots of water for atleast 8 to 10 hours and pressure cook with a little salt on high for 1 whistle and then on medium-low for about 20 mins (5 whistles). I did it this way and the rajma was really soft. I could mash it between my fingers. I like it like that.

    
    Punjabi Rajma Curry
    
    I followed the Punjabi Rajma Masala word-to-word (ingredient-to-ingredient). So I am not re-writing the recipe.

    I tweaked the sandwich recipe. I made a salad and we had it with cheese toast. So here’s my version of the Rajma Salad.

    Rajma Salad:
    1.5 cups Cooked Rajma
    1 cup – Finely Chopped Red Onion
    1 cup – Deseeded and Finely Chopped Salad Tomatoes
    1.5 cups – Finely Chopped Cucumber
    10 sprigs – Finely Chopped Coriander
    2 tsp – Chat Masala Powder
    A few Coriander leaves for garnish

    Combine Rajma, onion, tomatoes, finely chopped coriander and chat masala and toss well.

    Dish the required amount into a bowl, garnish with coriander leaves and serve.

    P, who isn’t a big rajma fan, loved both the dishes.

    
    Rajma Salad
    
    This is my entry to Nupur’s BB7 – The Iron Chef Edition event.
    Cooking, Event, Salad, Weekday Dinner.

    Tuesday, 14 September 2010

    Bhindi Fry

    Bhindi, Bendakaya, Okra - Not a favourite with many. But it is one of my favourite vegetables. I can eat it literally in any form. Bhindi fry is my all time favourite.

    So when I saw that Kiran of Sumadhura was hosting Veggie / Fruit a month that was started by Priya of Mharo Rajasthan's Recipes, I knew I had to take part in it. Its a vegetable I really enjoy cooking and eating.


    Cutting fresh Bhindi can get very very slimy. I use Frozen Cut Bhindi. This saves my time and my hands. Yes... I am lazy.

    Today, I am sharing with you a recipe that my pinni(mom's sister) told me. According to me, she makes the best Bhindi Fry.


    Ingredients
    1 Packet Frozen Cut Bhindi (400 gm)
    1 Onion - Chopped
    3 Dry Red Chillies - Broken / Torn into 3 to 4 pcs each
    1 tsp Mustard Seeds
    2 tsp Cumin Seeds
    10 - 15 Curry Leaves
    1 tsp Garlic Paste (I don’t like the bite of Garlic. You can replace this with 2 cloves of garlic chopped or crushed)
    1/4 tsp Turmeric Powder
    1 tbsp Chilli Powder (It'll be quiet spicy)
    Salt to Taste
    2 to 3 tbsp oil

    Method:
    1. Heat Oil in a Pan. When hot, add the Red Chillies and fry for a minute.
    2. Now add the Mustard Seeds and let them splutter. Then add the Cumin Seeds and let them crackle.
    3. Now add the Curry Leaves and fry for another minute.
    4. Add Garlic and fry for a minute.
    5. Then add the Onion and fry till it browns.
    6. Now add the Turmeric Powder and Salt. Mix well.
    7. Add the Bhindi and fry till done. Some people like to cook it open so it really shrinks. I like to cook mine covered. It cooks faster (I told you I am lazy) and you end up using less oil.
    8. Once done, add the chilli powder and mix well.

    Serve hot with Rice & Dal or Chapati. I love eating it with plain curd. Try it. You might like it.

    Sometimes, I avoid the onions. It tastes great both ways. But P likes it with onions. So that's what I end up making most of the time.


    I am already looking forward for the round-up as I would love to see what else I can make with this vegetable.

    Sunday, 12 September 2010

    Beetroot Curry and my First Food Event

    I had another blog that I started more than 3 years back but couldn’t maintain it. When I decided I will maintain my blog, I wanted to start fresh. The other blog had our names in the url – which I decided I didn’t like. I had already submitted this dish for the Event Healing Foods – Beetroot. When I requested Priya to cancel my entry and told her that I will be sending the entry from a different blog, she was fine with it. So her event will be first one I take part on this blog.

    I have always liked taking part in food blog events. But I never had the time to be a regular. Now I’ve decided to take part in more events. But that doesn’t mean I will take part in all the events. I will take part in something only if I feel I will genuinely enjoy making a dish for the event.

    Healing Foods was started by Siri of Siri's Corner. This month, its hosted by Priya of Mharo Rajasthan's Recipes, the topic being "Beetroot".


    When I was a kid, I never liked the "look" of beets. But once I had Beetroot Pulusu and I was hooked onto it after that. When came to the UK, I couldn't find the beets in the supermarkets. I got the pre-cooked and preserved varieties. But not the raw type.

    Some one told us about this new Asian shop. I was so excited when I saw the raw beets there. I had to get them and cook. From then, I kept getting beets every now and then.


    Ingredients:
    1 Kg beetroot - peeled and cubed into 1/2 inch pieces.
    2 big onions - chopped finely
    5 tbsp chopped tomato
    1 tbsp ginger garlic paste
    1 tsp chilli powder
    1 tsp coriander powder
    1/2 tsp cumin powder
    1 tsp mustard seeds
    1 tsp cumin seeds
    10 to 15 curry leaves
    salt to taste

    Method:
    1. Heat oil in a pressure cooker. Once the oil is hot, add the mustard seeds.
    2. When they pop, add the cumin seeds and let them splutter.
    3. Then add the curry leaves and fry for 1 min.
    4. Now add the onions and fry till they turn brown.
    5. Add the ginger garlic paste and fry till the raw smell disappears
    6. Add the chopped tomato and fry till the curry comes together.
    7. Now add the raw spices (Chilli Powder, Coriander Powder, Cumin Powder) and salt and mix well.
    8. Add the beets and 1/2 cup water. Pressure cook for 3 whistles or till the beetroot is done.
    9. If needed, boil uncovered to get the consistency required.